 |
 |
||||
 |
|||||
 |
|||||
 |
|||||
 |
|||||
 |
|||||
|
|||||


 |
Ā | |||||||||||||||||||||||||||||||
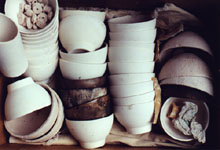
Raku - FiringThe following series of photos shows the process of firing raku. Before we start we need to prepare several things. First of all we need some ceramics
to glaze and these pieces need to have been bisque fired. The picture on the right shows
some small bowls I use to experiment with. They have been slip cast and are relatively
thin.
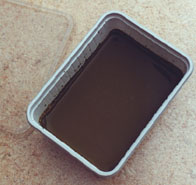
The other thing we need in order to start preparing the work is a glaze. Several commercial 'raku' glazes are available, but as the glaze and the effects that are created with it have such a great impact on the resulting work, I really want to fine-tune the recipe myself. The picture on the left shows a combination of ingredients. In this example the base of the glaze is formed by 50g of Gerstley Borate and 50g of Nephelin Syenit. This would result in a whitish glaze with large cracks but here I've added 3g of potassium dichromate (orange powder) and 5g of lead oxide (black powder) which will yield a shade of green somewhere between that of grass and Elstar apples. Some peptapon was added to increase the viscosity and the stability of the dispersion.Without it, the solid base parts in the dispersion would settle real quickly and the glaze would run of the work. The addition of the peptapon makes the glaze less waterish and more like yoghurt allowing an easy and homogeneous application. The other picture shows the glaze once water has been added. The amount of water and peptapon that are required depend not only on the ingredients of the glaze but also on the way it is going to be applied. Dipping, pouring, painting or spraying all require a different viscosity.
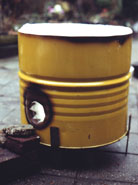
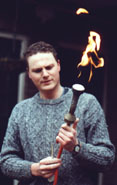
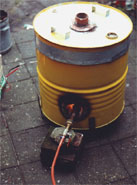
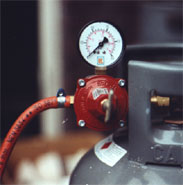
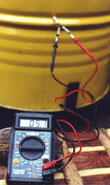
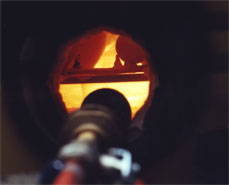
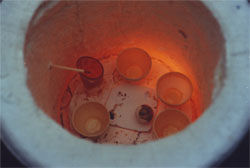
Once the glaze is applied onto the work, I let it dry and what is left behind is a powdery matte layer, completely different from the result we will get. The work is put in the oven. The lid is closed, the fire lit, and the torch is placed in the kiln. In the beginning the gas pressure is kept fairly low to have only a slow temperature increase. The work still contains a lot of water (from the glazing) which needs to be removed slowly, otherwise the work will explode. You can check if the work is dry by holding a piece of glass above the chimney when you have temporarily turned down the gas pressure. If water condenses on the glass then this clearly is a sign that the work is not yet thoroughly dry. (You have to turn down the gas to observe this as burning gas also produces humidity.) Once the work is dry the temperature can be increased faster up to about 1000°C. I use a Ni-Cr-Ni thermocouple and a multimeter to keep track of the temperature. Every mV corresponds to 25°C, but this is dependent on the type of thermocouple that is used. Looking in the oven from above through the chimney isn't advisable. Especially at higher temperatures this tends to strip off your eyebrows. From this point of view it's better to peek in through the hole in the side that accommodates the the torch. At the melting temperature of the glaze, you can see the orange glowing ceramics being covered by a shiny layer of liquid glaze.
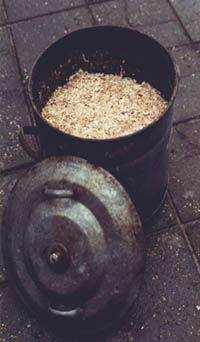
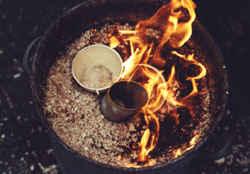
Once the desired temperature has been reached the gas is turned off and the lid is raised from the oven. All the typical raku glaze effects are introduced in the next five to ten minutes. The work is removed from the oven and usually put in a container with sawdust, wood flakes or something similar. The heat from the piece of ceramics ignites the wood which starts to burn. The container is closed and after 20 to 30 minutes, the work has cooled sufficiently to be removed from the container without much smoke being generated. It is cooled down completely with water and then cleaned with some abrasive and a scourer. Now how can the effects in the glaze be influenced. First of all, it is important how quickly the object is transferred from the kiln into the sawdust. The biggest temperature shock is obtained when the kiln is opened. If the work is transferred immediately into the container and then closed, the glaze won't be very rich in cracks. If you wait too long (several minutes) the work will cool down so far that it will not be able to start a fire anymore and the parts that have not been glazed will remain uncolored. The most typical effect is achieved at the intermediate situation when the work is put in the sawdust as soon as the cracks start to appear. This is something you can actually hear! The fire will then turn the unglazed parts into a matte black, and color the cracks to the same shade.
Once in the container a certain level of reduction can be achieved. Reduction is the
exact opposite of oxidation and occurs in the absence of oxygen at these elevated
temperatures. Where oxygen turns the metal copper into the green we know from
churchroofs, reduction can turn copperoxide from the glaze back into the shiny metallic
shade. Less noble metal salts are not as easily transformed back into the glossy metal,
but nevertheless a dramatic colorchange may be achieved. So having only a small volume of
air in the container and keeping the lid tightly closed increase the reduction effect and
also locally; the side that is covered with sawdust tend to reduce more than the sides
that remain uncovered. |
|
|||||||||||||||||||||||||||||||
|
|
© 2002 Hans de Brouwer |
|||||||||||||||||||||||||||||||
 Usually more robust works made of clay with grog are recommended for raku firings
because these are more resistant to the temperature shock which is inherent to the
process. I've found however that even relatively thinwalled pieces can be
withstand the temperature shock as long as they are homogeneous and not too large. The
clay I use for the slip casting is free of grog of course but I usually add some 20-25%
of plain sand to it also with the aim of increasing the resistance to temperature
shocks.
Usually more robust works made of clay with grog are recommended for raku firings
because these are more resistant to the temperature shock which is inherent to the
process. I've found however that even relatively thinwalled pieces can be
withstand the temperature shock as long as they are homogeneous and not too large. The
clay I use for the slip casting is free of grog of course but I usually add some 20-25%
of plain sand to it also with the aim of increasing the resistance to temperature
shocks.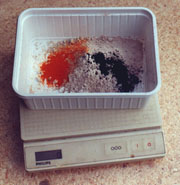
Last update: